GTA Lobby Hack
Posted on 2021-01-09 in network • 3 min read
Introduction
I don't play GTA myself, but I was approached with a list of instructions of steps to take to make this happen. This is the list:
This method will only work if your Xbox is connected to the internet via Ethernet AND WiFi. You must also have admin access/credentials to a router that has a function to change your firewall level.
1. Restart your xbox.
2. Load GTA with the ethernet cable PLUGGED IN. Once you see a bunch of text (the EULA stuff) force quit the game.
3. Unplug the ethernet cable and wait for a few seconds for your Xbox to switch to WiFi.
4. Load into a public lobby on WiFi while your Ethernet cable is still unplugged.
5. Open an internet browser and find your router's control panel page. It could be https://10.0.0.1/ , https://192.168.0.1/ , https://192.168.1.1/ , or something else. You can use a computer to find it by going to your command prompt (CMD) and entering ipconfig. It should display your "Default Gaetway". You can use that address in your browser. If it says it isn't secure, you can proceed under the advanced tab.
6. Find your router's firewall settings and set them to high. Some routers won't have this option. This method simply won't work for you if that is the case.
7. Plug the ethernet cable back into your Xbox to clear the lobby. Everyone should leave the lobby. If you get booted to story, set the firewall back to normal and restart from the very beginning.
8. Wait 10 minutes.
9. Go back to your router control panel and set your firewall back to normal. You should have a locked lobby now.
Step 6 poses a problem, because "High" and "Normal" don't mean anything in OPNSense. So I found this list for ARRIS modems highlighting the difference between the roles. So took this and applied it to a group of OPNSense rules
OPNSense Setup
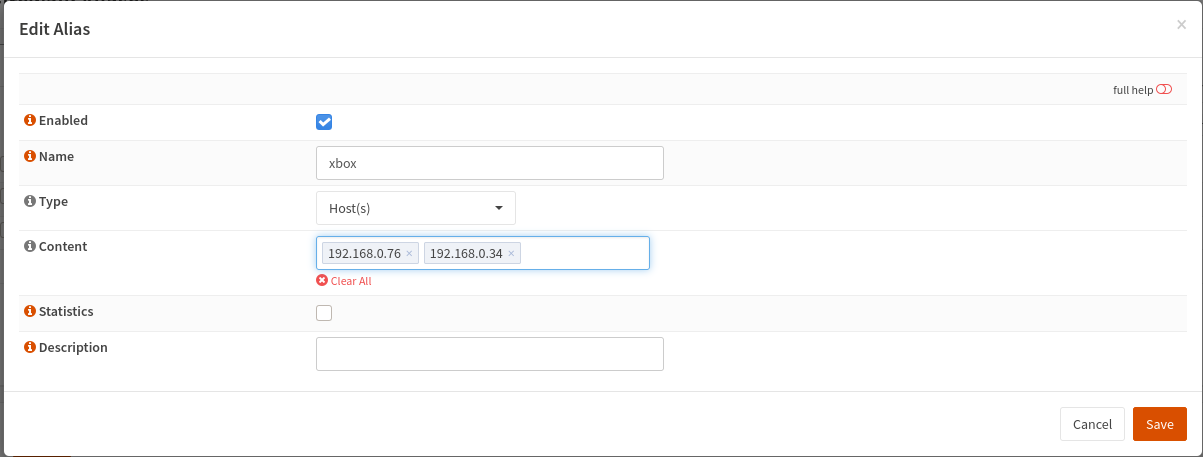
I only want the rules to impact the xbox, and nothing else on the network. So the first thing I did was add an alias for the xbox's wired and wireless interfaces.
Alias
- Navigate to Firewall -> Aliases
- Click the [+] button to add an alias
- Ensure Enabled is checked
- Give it a name
- Set type to Host(s)
- Enter your 2 IP addresses associated with your xbox interfaces.
Your settings should look something like this:
Add the rules
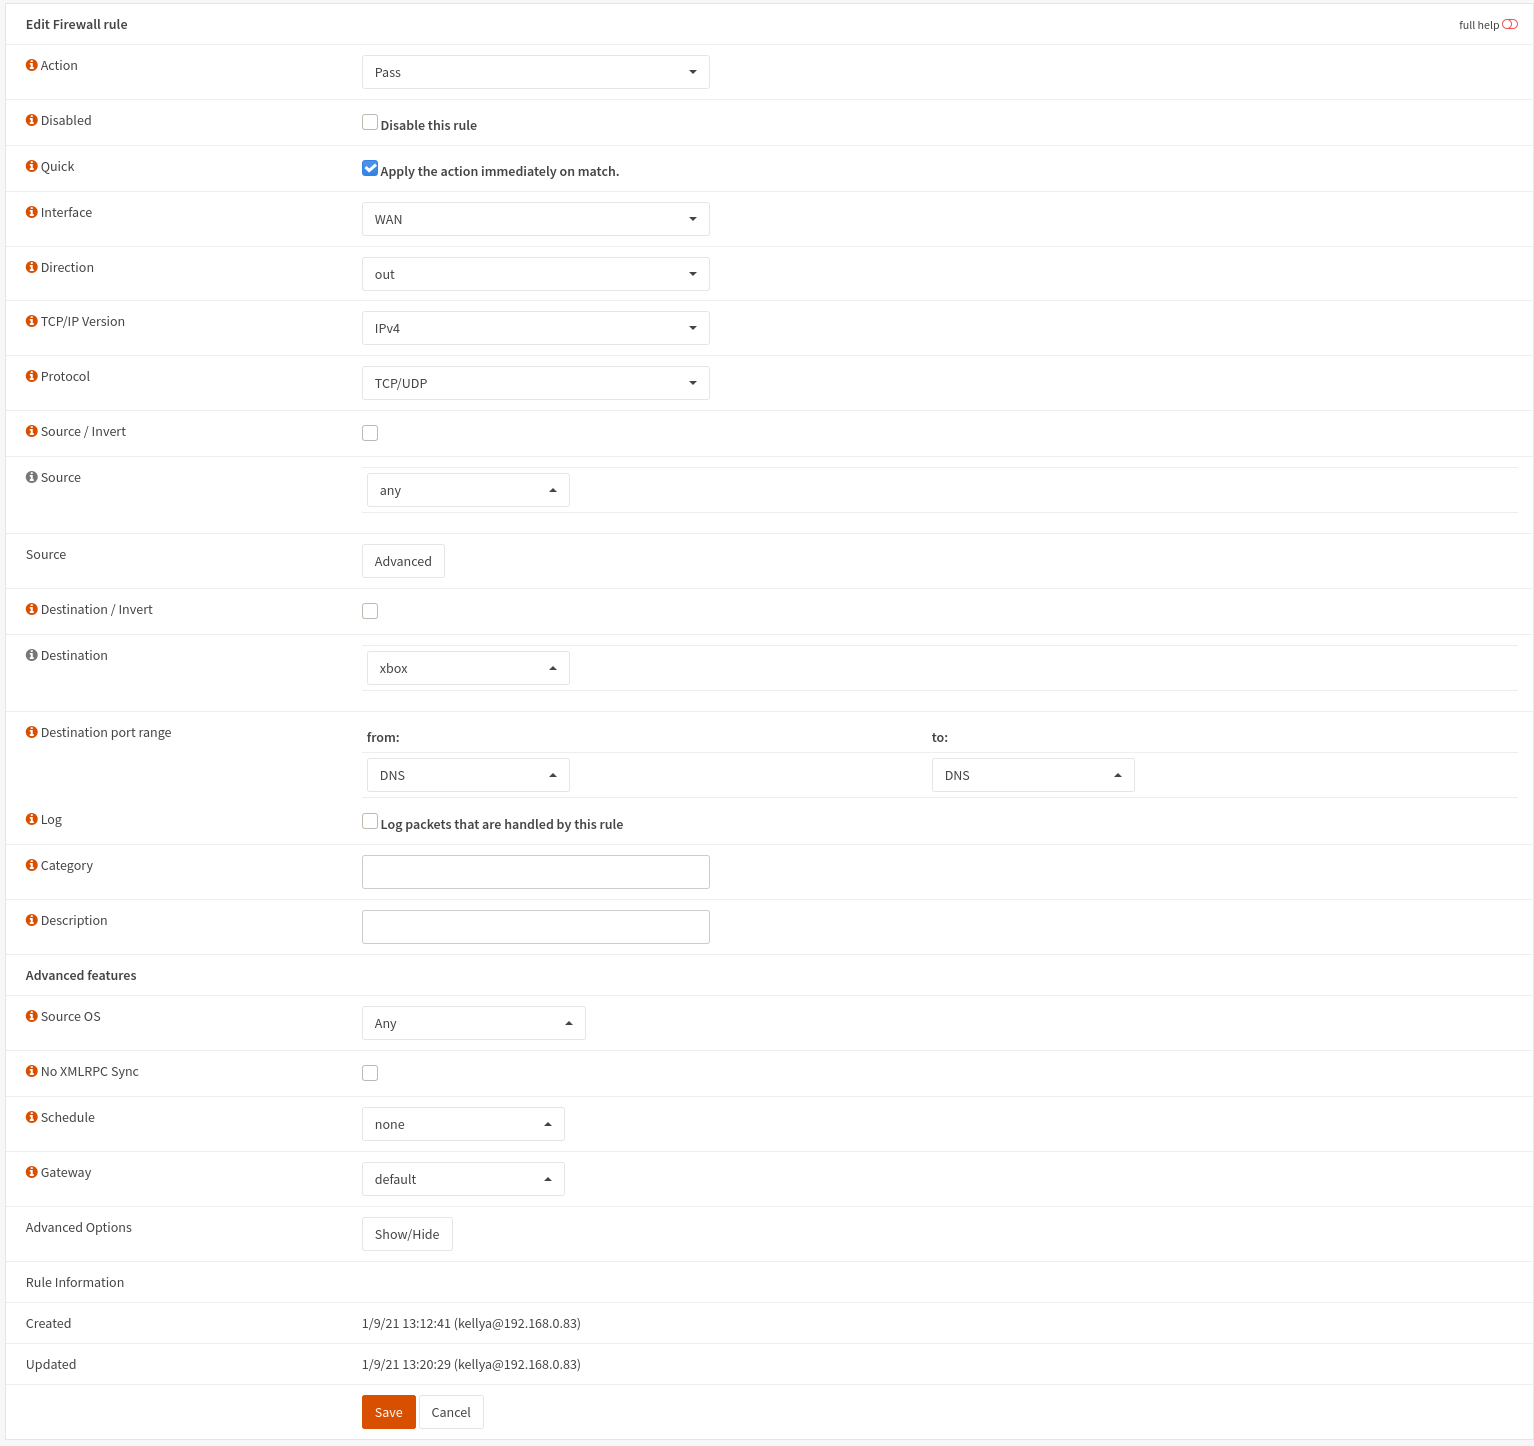
Now we need to add rules to simulate "High" firewall protection. This means we are going to setup a list of rules that are allowed outbound, and then deny everything else.
For the first group of rules, the action is going to be pass. I would recommend setting the first rule, and then "cloning" each remaining rule to make editing easier.
Navigate to Firewall -> Rules -> WAN
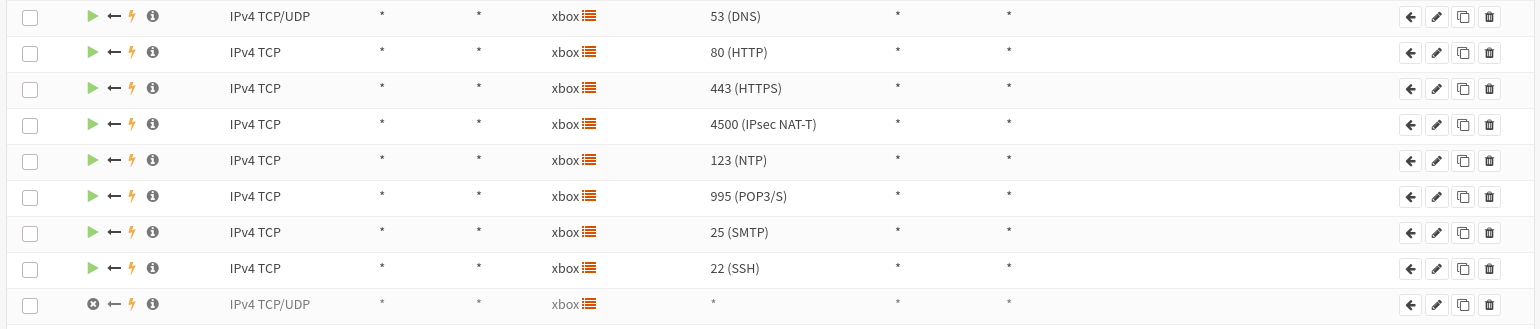
We need to make a rule for each of the following:
| Protocol | Port |
|---|---|
| TCP/UDP | 53 |
| TCP | 80 |
| TCP | 443 |
| TCP | 4500 |
| TCP | 123 |
| TCP | 995 |
| TCP | 25 |
| TCP | 22 |
- Set Action to Pass
- Set Interface to WAN
- Set Direction to out
- Set Protocol to the appropriate setting for the port you are allowing. Esentially DNS and the final blocking rule will be "TCP/UDP", all others will be just "TCP"
- Set Destination to The alias created in the section above. In my case, I called it xbox, so that's what I picked here.
- Set Destination Port Range to the appropriate port per the table linked above.
When you have entered all of the data for one rule, it should look similar to this:
Repeat all the steps for each rule listed in the table.
Then create one final rule where the Action is Reject, and the Destination is the xbox, with source and Destination Port Range both being any. This is a default deny rule that when enabled will block evertyhing to the xbox Except the ones in the table we just allowed above. When it is complete, your overview should look something like this:
Putting it all together
Once we have the rules set, now we can revisit the original steps in the introduction. Instead of switching between "Normal" and "High", We are now going to enable or disable the deny all rule. So when going to normal mode, disable the rule, when switching to high, enable the rule.
Remember to hit the [Apply] button when changing rules.